Cerberus FTP Server
Azure Cloud Configuration Guide
1.0 Running Cerberus FTP Server with Microsoft Azure Cloud
Specifications of the hardware and software used to run the test appear below.
Azure Cloud VM (1 instance)
- AMD EPYC 7452 32-Core Processor with 1 Processor, 2 Cores (4 Threads), x64 processor
- 16 GiB RAM
- Windows Server 2019 Datacenter, 64-bit
- Storage: 127 GiB Premium SSD
- Cerberus 11.1.0.0 with FTP, FTPS and SFTP listeners
- Network capacity unlimited pay-as-you-go
1.1 Log Into Microsoft Azure Cloud
by navigating to https://portal.azure.com in a browser. This is the Azure ‘homepage’. You’ll be prompted to sign in with your Windows account or to choose another account. One of the benefits of Azure is that you can use your regular Windows account instead of having to maintain a separate account. Of course, you can choose to have a separate account, just for maintaining your Azure environment so that you can potentially share the account with other administrators.

Using your current account is convenient as you will not need to re-authenticate with Azure cloud hosting if you are using Windows.

1.2 Create Instance
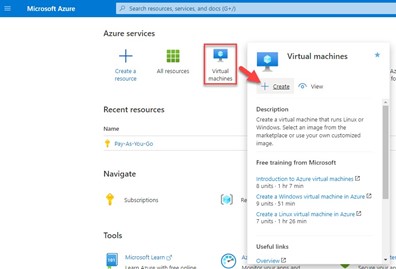
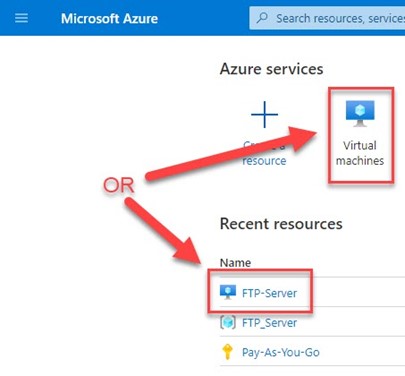
Under ‘Azure services’, click ‘Virtual Machines’ and then ‘Create.’
1.2.1 Step 1: Basics Tab
On this screen, start by Naming your ‘Resource Group’. It’s recommended you use something recognizable, like ‘Cerberus FTP Server’ or ‘FTP Server’. Do the same in the ‘Virtual Machine Name’. Leave the remaining settings alone for now. You’ll update them on other screens.

1.2.2 Step 2: Select an Image
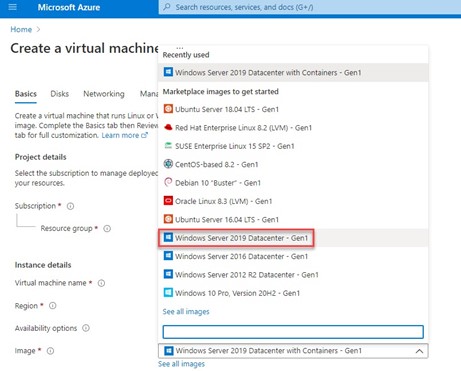
Next, you will select your ‘Image’. ‘Image’ should be the most recent ‘Windows Server Datacenter’ instance ‘with Containers. If this is not already pre-populated, click the ‘Image’ dropdown to select the correct Image.
1.2.3 Step 3: Choose a VM Size
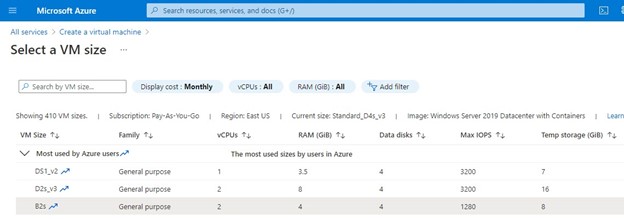
Now, click ‘Size’ to select a VM CPU and RAM size. Our recommendation is at least 2 vCPU’s and 8 GiB of RAM, but you may want to invest in a more powerful processor if you think you will be running thousands of processes an hour.
1.2.4 Step 4: Set Admin Username and Password
Now that you have selected the size, move on to the next section, ‘Administrator Account’ and set the administrator username and password for your new Azure instance.

1.2.5 Step 5: Set Inbound Port Rules
Next, under the ‘Inbound Port Rules’, click the up arrow to see your options. If you plan to use the Cerberus Web client, select ‘HTTP (80)’ and ‘HTTPS (443)’. For SFTP, select ‘SSH (22)’. If you plan to use FTP or FTPS on ports 21 and 900, as well as the passive port range, you will do that in a later step.

1.2.6 Step 6: Set Inbound Port Rules
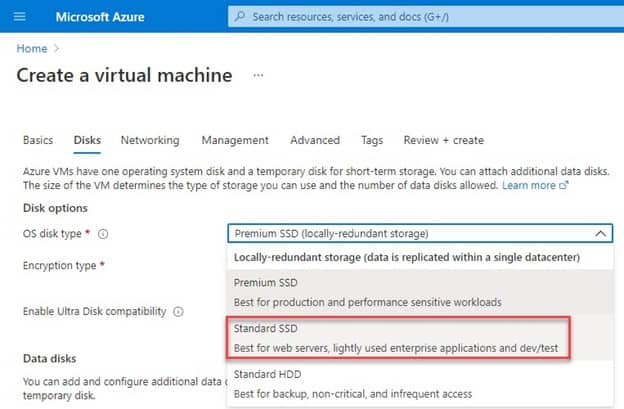
Microsoft will pre populate ‘Premium SSD (locally-redundant storage). This is generally overkill for an FTP server with standard volumes of traffic (up to several hundred connections per hour). If you anticipate a high volume of traffic, then the Premium SSD may be best, however, in most cases, the Standard SSD is sufficient and lower cost.
The default encryption at rest with a platform-managed key is fine for most Cerberus instances, but if you wish to explore the other options available to you, please refer to this document: Introduction to Azure Manage Disks
1.2.7 Step 7: Networking, Management, Advanced and Tags Screens
For a basic Cerberus instance, you can just advance past the ‘Networking’, ‘Management’, ‘Advanced’ and ‘Tags’ screens, right to ‘Review & Create’. You are free to review the options available on these screens to see if you wish to include any in your Cerberus FTP Server VM, but they are not necessary in general, and many come at extra cost.
1.2.8 Step 8: Review Your Settings and Create Your Instance
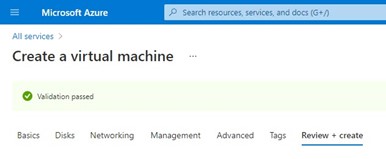
On this screen, first, make sure that you have the ‘Validation Passed’ checkmark. This tells you that Microsoft has all the settings they need in order to create your Microsoft Azure instance. Review all the settings on the page and ensure you have set it up the way you want it to be. You can click on any of the breadcrumb links at the top of the page if you need to change anything. If you are happy with your setup, click ‘Create Instance’ to establish your instance.
1.2.9 Step 9: Complete Network Settings
Your instance will take a few minutes for Microsoft to set up. Once it is ready, if you plan to allow FTP and/or FTPS access to your server, click on ‘Virtual Machines’ or your VM’s name under ‘Recent Resources’ to see its settings.
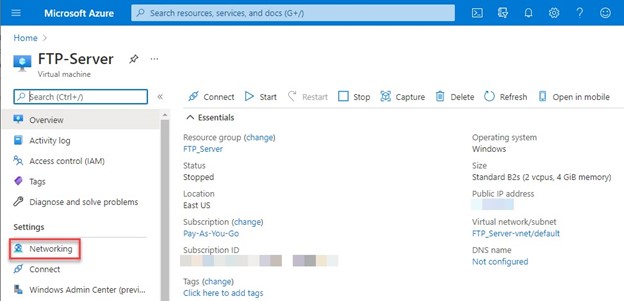
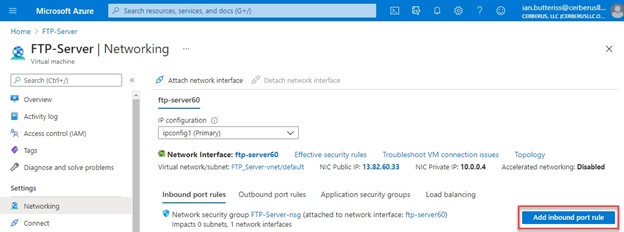
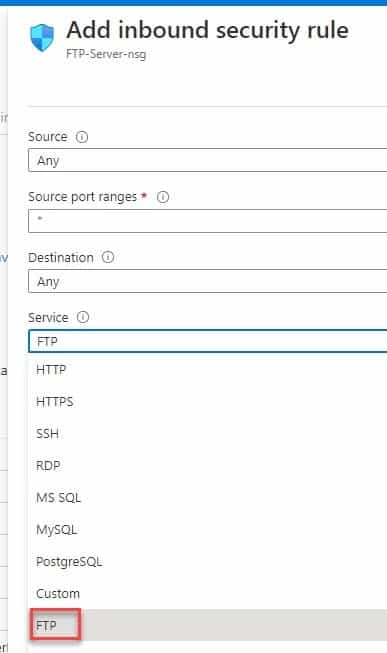
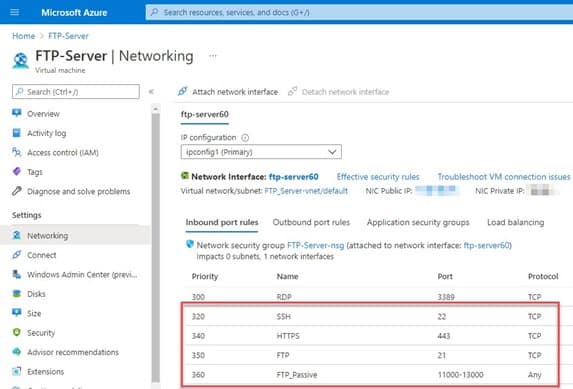
Your ‘Networking’ screen should now look something like this (Note this example does not include FTPS).
1.3 Connect to the Instance
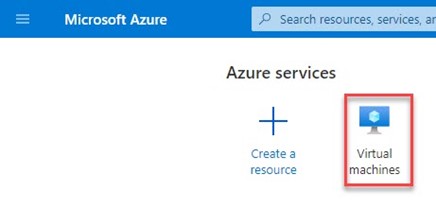
This process will describe connecting to your Azure instance via the Remote Desktop Protocol (RDP). You can also connect with SSH or Bastion. See Azure for those instructions. Start by logging into Azure and click on ‘Virtual Machines’
1.3.1 Step 1: Select Your Server
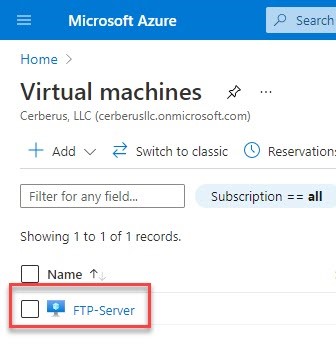
Next, click on the name of your server
1.3.2 Step 2: Start Up the Server
Now, if your VM is not already running, select ‘Start’ at the top of the modal window that appears to start up the instance.

1.3.3 Step 3: Connect to Instance
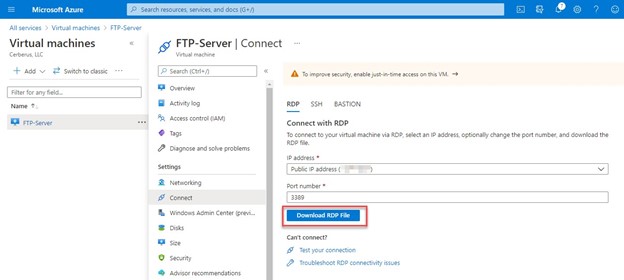
Once it is running, click on ‘Connect’, and select ‘RDP’ at the top of the modal window that appears

1.3.4 Step 4: Download RDP File
Click ‘Download RDP File’
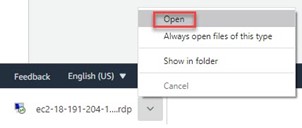
1.3.5 Step 5: Open the Remote Desktop File
Once the remote desktop file is downloaded, you can select ‘Open’ to launch the RDP client.
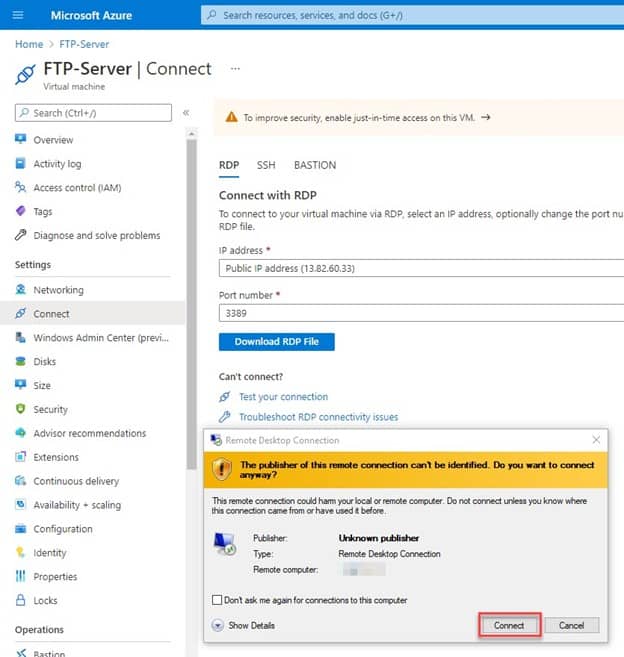
1.3.6 Step 6: Initiate the Connection
In this example the remote desktop client prompts you that the publisher of this connection is not identified and asks if you wish to connect. Go ahead and click ‘Connect’.
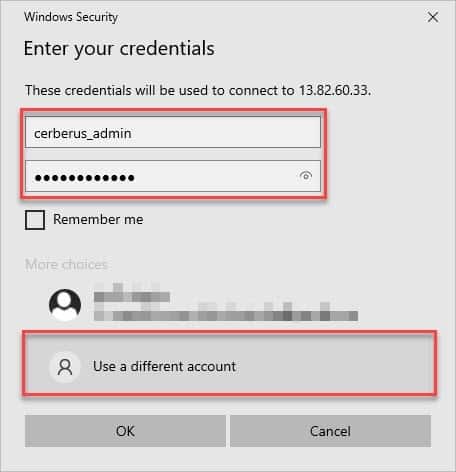
1.3.7 Step 7: Enter Your Password
RDP will next prompt you to enter the decrypted password. This will be the admin username and password you set up when you created your instance.
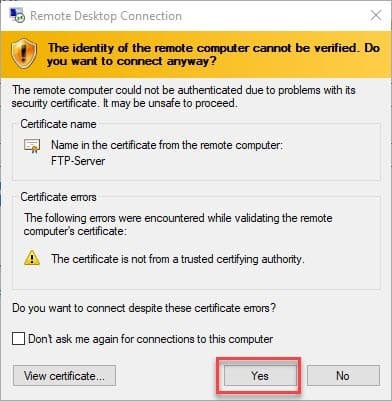
1.3.8 Step 8: Accept Certificate Prompt and Open Instance
Select ‘Yes’ when prompted to connect despite the certificate error. Since the certificate was generated by Azure, you do not need to be concerned about this error and you can decide to select ‘Don’t ask me again for connections to this computer’ if you wish.
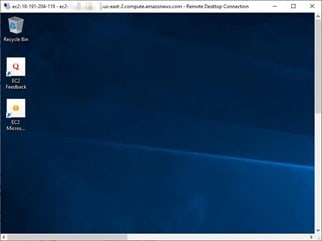
RDP should now open the AWS cloud hosting instance. You can now follow the steps outlined in the Cerberus Online Help to install and configure Cerberus just as you would on an on-premises server.
2 Install Cerberus FTP Server on Your Cloud VM
Now you are ready to install Cerberus FTP Server on your Cloud VM.
To download the Cerberus FTP Server executable onto your Cloud VM, navigate to the Cerberus FTP Server website at https://www.cerberuftp.com.
To install Cerberus, follow the steps in these documents
Much more documentation is available in our Online Help library and FAQ’s
For help with issues and questions related to the Cerberus application, you may contact Cerberus Support at support@cerberusftp.com. Our hours of operation are from 9am to 5pm Eastern USA Time.
Explore what Cerberus FTP Server can do for you
- 25 Day Free Trial
- No Credit Card Required
- Up and running in less than 15 mins